
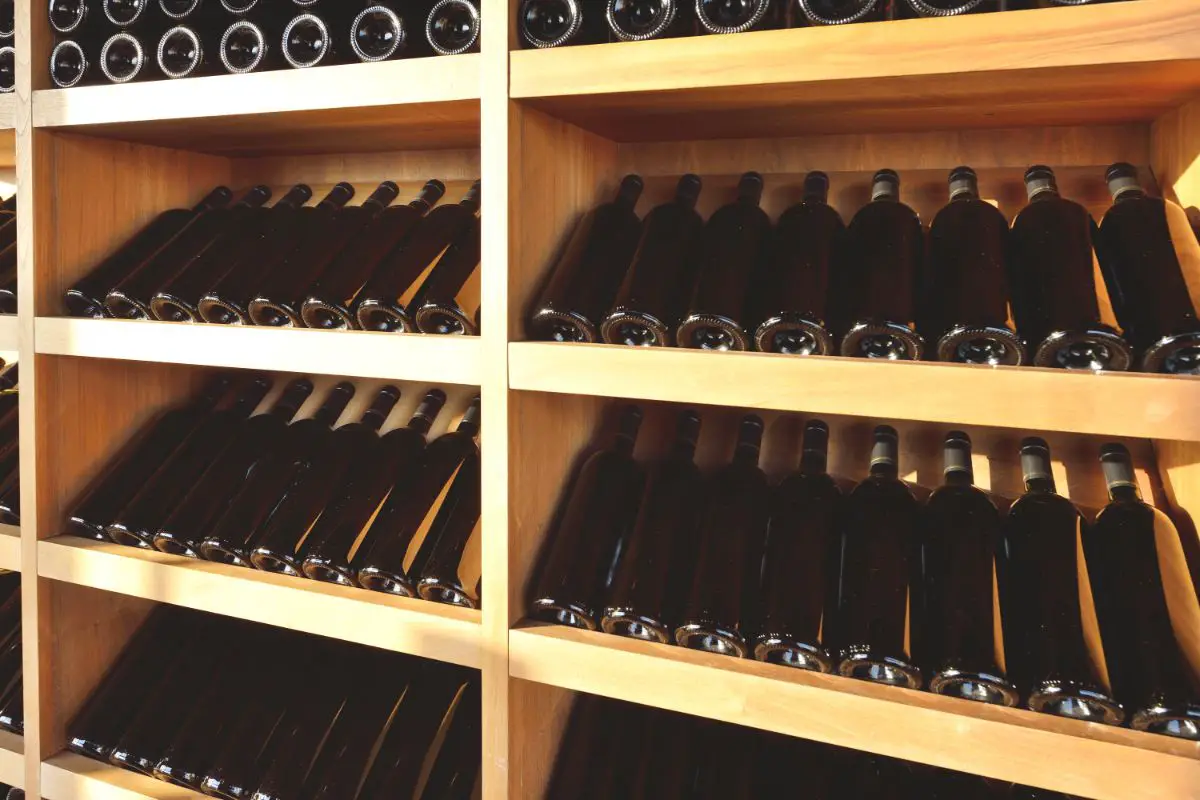
Many people enjoy a glass of wine, and whether you are an occasional drinker or a wine connoisseur, it is nice to have somewhere special to store the bottles. Even if you don’t have a wine cellar, there are many options for you to store and showcase your wine. Of course, you can just go to the store and buy a wine rack but it is more rewarding to make your own. In this article, we will be taking a look at DIY wine racks. Not all of them need special skills and can be made by people with basic knowledge of DIY.
1 – A-Frame Wine Rack
The first thing to do is to sketch out the wine rack. You will need to have enough space between each hole so that there is clearance between the bottles and enough room for you to put your hand in to get them. In addition, ensure that the angle of the hole is bigger than the angle the wood is tilted at. Most of the weight must be downwards.
The next thing to do is cut out the wood pieces. It is a good idea to use thick wood so that it can support the bottles. Once you have done this and have the two halves, drill the holes for the wine bottles using a jig. You may have to do this on both sides of the wood to ensure that the holes go all the way through.
Before you fix the two pieces of wood together, stain the wood in whatever color you want. Then use hinges to connect the two pieces. Finally, add the chains.
This wine rack is suitable for people with just a few bottles of wine that they want to store, though, of course, you could make more than one. You could have one for red wines, one for white, and another for rose. You could even make one for sparkling wine but remember that sparkling wine bottles are larger than standard wine bottles so you will need to make larger holes.
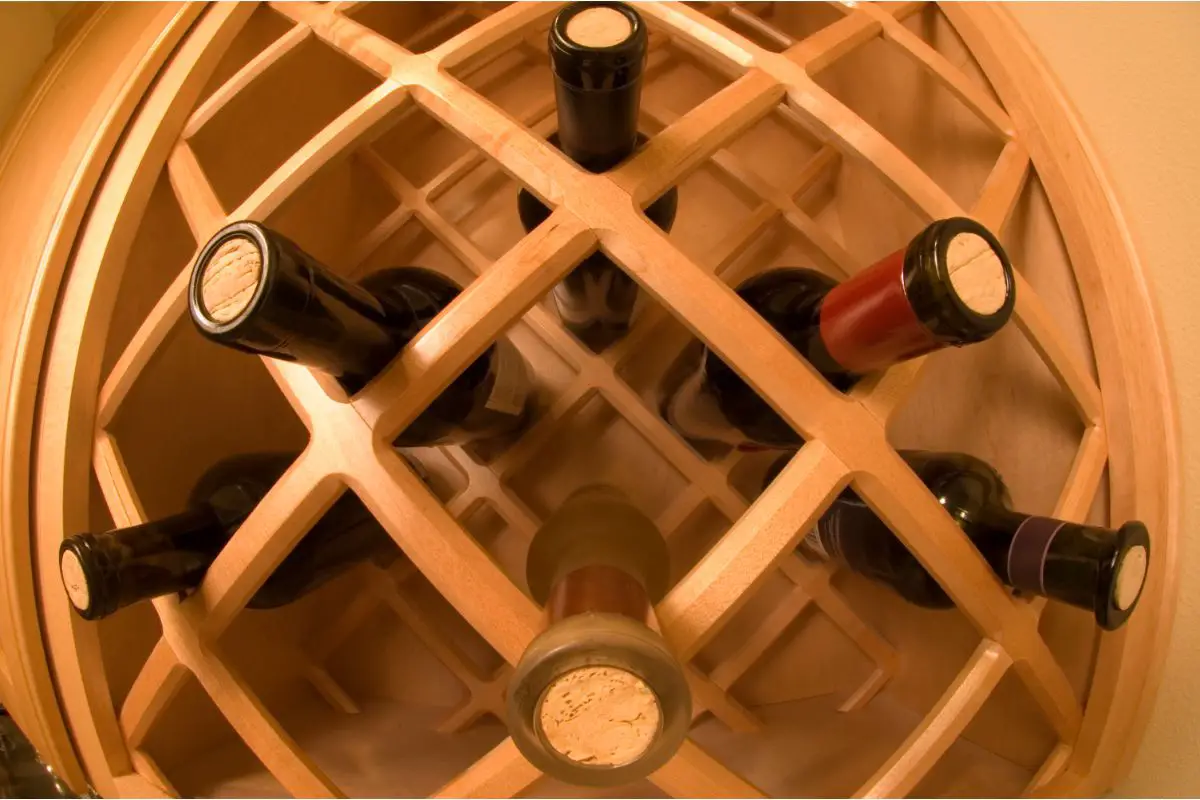
2 – Diamond Wine Rack
A diamond wine rack is very stylish. It can be mounted on the wall or, if you have cubby holes, you can fit one in each. Store different colors, different brands, or different varietals of wine together.
You can make these wine racks as big as you want and with as many diamonds as you need. It all depends on the size of your wine collection. A Diamond wine rack with a 14-inch interior will hold a case of wine, in other words, 12 bottles.
The first thing to do is to cut the top, bottom, and sides of the wine rack. Then cut and secure the bin boards. You’re now ready to store your wine bottles.
3 – Make a Wine Rack From a Wooden Pallet
One of the easiest ways to make a wine rack is by utilizing a wooden pallet. It is a very economical way to go as long as you can get hold of a wooden pallet. Grocery stores are the best places to find wooden pallets. They are continually getting new stuff in and end up with more pallets than they need and have to get rid of them.
Once you have secured the wooden pallet, these are the steps to follow.
- Take apart the wooden pallet. You should use either a hammer or a pry bar to remove the board from the base.
- Cut the wood and sand it. With a saw, cut at least 8 pieces of wood, each measuring 16 inches in length. Then sand down the wood. You may not think this is necessary but it makes it easier to paint the wood. In addition, you can get splinters from the wood and sanding will stop this from happening.
- Prepare the back of the wine rack. Lay out three pieces of wood on the floor. You can leave a little space in between them as it may look more attractive.
- Connect the sides to the back. Get two more pieces of wood and lay one next to one side of the back and the other, next to the other side. You can choose the width to suit your decor. You can also use a saw to change the shape of the sides. Perhaps, you would like to make them concave or convex. The choice is yours.
When you have done this, turn the pieces upside down and nail the back pieces to each other and the side pieces.
- Make the top and the bottom of the wine rack. Take another two wooden pieces and nail one to the top of your wine rack and the other to the bottom.
- Depending on how big you want the wine rack to be, add shelves, nailing them to the sides.
- Make holes for the wine bottles on the shelves. Using a jig, drill the holes making sure that there is enough room for your hands to get in to remove the bottles.
- Add wine glass holders. If you wish, save a shelf for wine glasses. Measure about three inches from the side and make a mark. Do this three more times and then use a chainsaw to cut ½ inch slots for the glasses. It is a good idea to sand down the notches to make them smooth.
- Paint the wine rack. Once you have followed these steps, paint the wine rack whatever color you want.
- Attach two hooks to the back of the wine rack so that you can hang it on the wall. Then you’re ready to fill the wine rack with your favorite wines.
4 – Add Removable Wine Racks
You may be surprised but you can probably utilize the space you already have to make a wine rack. If you have a buffet sideboard where you display plates and ornaments, why not use the space for wine bottles? Get some wire shelves and put them in. It is a good idea to get removable shelves in case you decide to use the cubby holes for something else at a later date.
5 – Use the Space Under the Stairs
If you have space under your stairs why not use it as your very own wine cellar? You can use any style of wine rack, whatever fits in the space, but a good idea is to put it on a trolley so that it can run in and out.
Because it is under the stairs, it will be climate-controlled like a cellar. When you close it, it will be a little sealed room.
6 – Use Your Kitchen Cabinets as Wine Racks
Instead of just putting your wine bottles in cupboards and shutting the doors, remove the cupboard doors so that you can see the bottles. You can then make shelves to fit the cupboards. Use any design for the shelves. Diamond is attractive and traditional while a chevron shape is more modern. If you don’t want to bother making shelves, you can stand up your bottles so that you can see the labels. Use different cupboards for different colors or varietals.
7 – Update Existing Wine Racks
Perhaps you have moved into a new home and there are existing wine racks. Why not update them? Paint them in colors to suit your decor. Join wine racks together to get a bigger rack. Put loose racks in cubby holes.
8 – Turn a Cabinet Into a Wine Rack
If you have a cabinet that you’re not using, you can turn it into a wine rack. For example, if you have a cabinet with a drawer on top and then a large cupboard below, remove the door from the cupboard. Insert a shelf and put your wine glasses on the top and then build a wine rack on the bottom. You can use triangles or diamond shapes for your wine rack. In the drawer, you can store wine accessories such as corkscrews, pourers, and cleaning cloths. You can serve your wine on the top of the cabinet.
9 – DIY Wine Bottle Holder
If you are a novice at DIY, this is the wine rack to start with. It is a bottle holder which will take two or three bottles.
This bottle holder is triangular in shape and will need three planks of wood. You can even use pieces of scrap wood. All you need to do is glue them together into a triangular shape. Use a very strong super glue to make sure that it sticks together. You don’t want it collapsing when your wine bottles are in situ.
The next step is to drill holes for the wine bottles and you’re done. You could make two or three of these for different colors of wine or varietals.
10 – Make a Wine Rack From Vinyl Records
This wine rack will get people talking as it is different and exciting. When you look at the finished product, it seems as if the records are floating without being supported.
The first step is to melt the record into a J-shape with a heat gun. To make it easier, then roll them around an empty wine bottle to get them into shape.
You will need a piece of wood to attach the records to. Wait until the records are cool and hard. Attach them using an epoxy adhesive and clamps.
Put two metal hangers onto the wood support and hang them on the wall. It may seem as if the records are too flimsy to hold wine bottles but the opposite is true. They have no problem at all holding full bottles.
You can make this wine rack as big or as small as you want. Just get the right size of wood for your requirements. You could even cover a whole wall with a vinyl record wine rack.
11 – Use Plumbing Pipes To Make a Wine Rack
Plumbing pipes make for a trendy wine rack. Just go down to your local DIY store and get some plumbing pipes or use some that you have and don’t need. It is a great way to recycle plastic and so lessen plastic pollution. There is too much of this nowadays and every little you can do helps.
The first thing to do is to cut the PVC pipes into sections. You will need sections for the wine bottles and the connections. The pipes for the wine bottle should be 4 inches while the pipes for the connections should be 1 ½ inches long.
Once you have cut the pieces of pipe, glue them together with strong glue. Using a glue gun is a good option. Hold each connection for about a minute to ensure that the pipes have stuck together. Once you have completed the wine rack, leave it to dry for around two hours.
Take the wine rack outside and spray with primer. Dry for half an hour. Then spray it with paint and leave to dry for another half an hour. If it isn’t the desired color, spray with paint again and leave for another 30 minutes. Keep doing this until you get the desired color. When you have sprayed the wine rack with paint for the last time, leave it to dry for two hours to make sure that it is completely dry. It is then ready to use.
A pipe wine rack is trendy, innovative, and exciting. It is sure to catch the eyes of your guests. It certainly makes a change from traditional wine racks.
12 – Barn Wood Wine Rack
Wood that comes from old barns is known as barn wood. If it is not too damaged, it is often used in interior design so if you have some, why not turn it into a wine rack?
There are different designs that you can choose from. You can use hooks to hold the wine bottles. To do this, first, spray paint the hooks and leave them to dry. Then get a piece of barn wood and paint with chalkboard spray paint. Once it has dried, screw the hooks onto the board. Then hang the rack on the wall using strong screws.
You could also make a diamond-shaped wine rack out of barn wood, or you could even make holes in the barn wood to hold the bottles. Make a shelf with the wood to store your wine bottles upright or make a hanging barn wood wine rack using strong wire to hold the rack. The opportunities are endless.
13 – Barrel Wine Rack
If you have an old barrel or have the opportunity to lay your hands on one, make a wine rack out of it. It will turn heads. Old wooden barrels have a character that is hard to be equaled.
There are many different ways in which you can turn an old barrel into a rustic and beautiful piece of furniture. You can drill holes into it all the way around so that you can store multiple bottles of wine. You can do this by keeping it upright or lying it down, whatever suits your room. Another option is to lie the barrel down and divide the inside into four compartments where you can stock multiple wine bottles. You could keep the barrel upright, make doors, and have shelves inside for the wine bottles. A nice touch is to put a glass table on top of the barrel so that you can drink sitting around the barrel.
